


Introduction: Recap of the Initial Flask Framework Article
Welcome back to our Flask Framework series, where we're embarking on a journey into the world of web development with Flask. If you missed our first installment, let's quickly revisit the key highlights.
In the inaugural article, we explored the fundamental concept of frameworks and their pivotal role in streamlining software development. We focused on Flask, a lightweight and flexible Python web framework known for its simplicity and adaptability.
Our guide, in a step-by-step fashion, walked you through the crucial steps of installing Flask on your machine. Emphasizing creating a virtual environment, we ensured a clean and isolated setup for efficient development. The main takeaways included the advantages of Flask, its lightweight nature, and a detailed installation guide for both Linux and Windows users.
As we progress into the series, prepare for a more in-depth exploration of Flask's capabilities. Future articles will delve into rendering HTML with Jinja templates, enriching your toolkit in web development.
For those looking to revisit the initial article or newcomers to the series, find the detailed guide on Flask installation and framework fundamentals.
Let's dive into the next chapter of Flask development!
Understanding Routes and Views in Flask
In the dynamic world of web development using Flask, two fundamental components play a pivotal role in shaping the structure and functionality of your application: Routes and Views. Let's unravel the significance of these concepts and explore how they seamlessly come together to create powerful web applications.
Routes in Flask: A Simple Overview
What are Routes?
In web development, "routes" are like the designated paths users take to interact with different parts of a web application. Think of them as specific URLs that lead users to various functionalities.
In Flask, routes tell the application where incoming requests should go and connect each URL to a particular function that knows how to handle that request. Essentially, routes guide the traffic and serve as the foundation for handling requests in your Flask application.
How to Define Routes
So, when we talk about routes, we're talking about the specific URLs users can visit to access different features or pages of our web app. They play a crucial role in directing and managing the flow of requests in the world of web development.
Basic routing in Flask
As earlier mentioned, routing is a very important concept used in Flask as it serves as the path to which requests are made and handled when bonded to a specific functionality.
In this article, I will take you through the basic structure of routing in Flask and explain the key components that make a flask route.
As seen in the first article, when we want to start our flask project
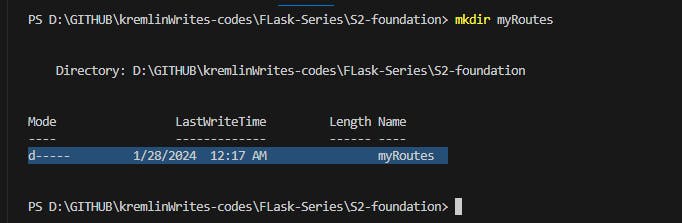
We create our main folder which will contain our projects.
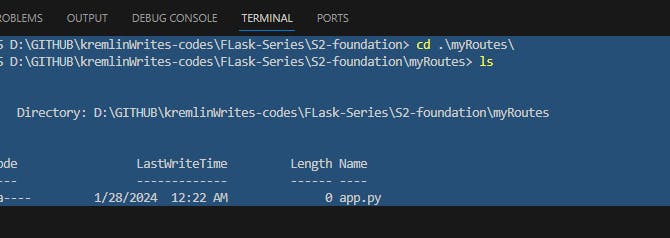
in this tutorial, I will call the folder, myRoutes.
After creating this folder, we can then create our file in the folder, the most commonly used app name is app.py which I will stick to but you can rename your file with any name of your choice.
I will then proceed to write my first line of code, which is to import the flask library.
from flask import Flask
Our next line will be to create an instance of the flask application.
app = Flask(__name__)
NB: All these lines of code are explained in our first article in this series, in case you missed it, I suggest you take a quick look at it to fully understand where and why these lines of code are being written.
Once we have created an instance of our flask application, we can then proceed to use this instance to create our flask routes.
Flask uses the route() decorator, which is a flask method to define routes and bind them to functions.
Now when we apply this route() decorator to a function, it becomes a view function. I will talk about view functions later in this article and how they are different from the normal functions we know.
Let’s proceed by defining a basic route for our flask application.
As you can recall, we created an instance of our flask application, called app.
We will apply the route decorator on this instance to define our flask route.
This is shown in the code illustrated below:
@app.route('/home')
Now I will take the components of the route so we can see what each entails.
@: In Python, the @ symbol is used as a decorator. Decorators are a way to modify or extend the behavior of functions or methods. In the context of Flask, the @app.route() syntax is a decorator used to associate a function (a view function) with a specific URL (route).
/home: This is the path that is defined by the route, so when a user visits the URL,
/homewhatever action is associated with that particular URL is executed.
Short Recap:
So far, we have looked at routes, what they mean, and why we use them in our flask applications, we have also looked at how to define a flask route and the components that make up a route.
Do you remember any of these and can you write a route now? If the answer is yes, that is a good way to go, if No, don’t worry as it will take time to assimilate this concept but with practice, you will do just fine. You remember I made mention of view functions, in our next paragraphs, we will look at the importance of these functions to routing in Flask. Let’s dive in!
Simply Called Views
Views in Flask and their Relationship to Routes
Views in Flask serve as functions bound to routes. Fundamentally, a view is a function associated with a specific route, created using the def keyword in Python. Once attached to a route, this function becomes a view. Given our understanding of functions as organized5 and reusable code, defining a view in Flask aligns with the straightforward process of creating routes.
NB: Routes in Flask are incomplete without view functions. This means that the previously defined routes are incomplete since no function was included.
Since we understand what a view function is now, I will proceed to define one to the route above.
from flask import Flask
app = Flask(__name__)
@app.route('/home') #Basic route
def index(): #View function
    return "Hello World!"

if __name__ =="__main__":
    app.run(debug=True)
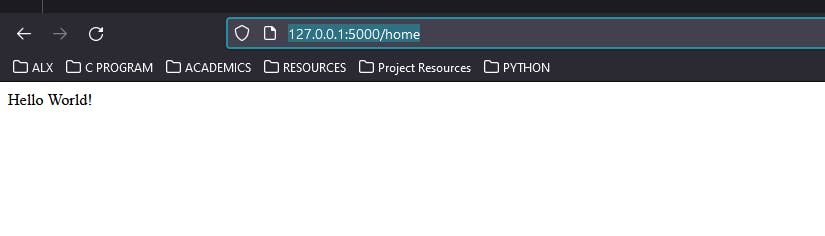
Great! We have defined a basic route with a view function that returns "Hello world"
To see the outcome of our route, we can start our flask server in development mode by running the command flask run.
Once your Flask server begins to run, you can proceed to visit the URL, http://127.0.0.1:5000/home to see the outcome of the view function I described above. You should see “Hello world” printed on your browser page.
As you may have noticed, there is a new “if” block of code that was not introduced in the introductory article. The purpose of this block is to serve as the entry point of our application and ensure the code is executed only when the script is executed directly and not when imported as a module.
app.run(debug=True): This line starts the Flask development server when the script is run.
The debug=True argument enables the debug mode, which provides additional information and automatically reloads the server when changes are made to the code.
Exploring the use of HTTP methods and route parameters in Flask
HTTP Methods in Routes
In Flask, you can handle different HTTP methods (e.g., GET, POST) for a specific route by specifying the methods parameter in the @app.route decorator. Additionally, you can use multiple methods for the same route.
To handle HTTP methods in routes, we use the methods parameter and pass the methods we want to use for that particular route as a list ([ ]).
A typical example is illustrated in the code below where the ‘GET’ method is passed as a parameter in the /home route.
from flask import Flask
@app.route('/home', methods=['GET'])
def index():
    return 'I am exploring HTTP methods with flask routes'
In the above route, /home responds to only a GET request as it is the only method defined in the route.
NB: Multiple methods can be used for one route.
That is:
from flask import Flask
@app.route('/home', methods=['GET', 'POST'])
def home():
    if request.method=='POST':
        return 'Form submitted successfully'
    elif request.method=='GET':
        return 'user profile'
The route defined above is responding to both a POST and GET request. The view function ‘home’ responds to these requests by using the If condition to check the appropriate method used to specify what should be done based on the request.
Passing data from routes to views
One interesting concept about routes in Flask is that parameters can be passed on routes and accessed by views. If you have observed something about URLs in general, you may have noticed that some parameters such as IDs and names are found on some URLs. These are parameters passed and accessed by view functions.
To do that in flask, we define our route normally but this time we include the parameter we want to pass in anchor tags. An example of this is illustrated in the code below:
from flask import Flask

app= Flask(__name__)

@app.route('/home/<username>',methods=['GET'])
def index(username):
    return username
As illustrated, the username is passed in the route and accessed in the view function by passing it to the view function as well.
Take note that, in specifying parameters on the routes, by default, we do not specify the data types of strings, the reason being for flexibility but for other data types such as int, float, uuid, and path, it is advisable to specify their data type.
Example below:
from flask import Flask
app= Flask(__name__)
@app.route('/user/<int:user_id>')
def user_profile(user_id):
    # Handle user profile for the specified user ID (integer)
    return f" User Profile for ID {user_id}"
from flask import Flask
app= Flask(__name__)
@app.route('/document/<uuid:document_id>')
def document_info(document_id):
    return f"Document ID: {document_id}"
from flask import Flask
app= Flask(__name__)
@app.route('/path/<path:subpath>')
def subpath(subpath):
    return f"Subpath: {subpath}"
Conclusion
In this installment of our Flask Framework series, we revisited the foundational concepts from our initial article, highlighting the importance of frameworks, introducing Flask, and guiding you through the essential steps of installing Flask on your machine. If you missed the first article, you can find it here.
Moving forward, we delved into the world of Flask routes and views, crucial components that shape the structure and functionality of web applications. Routes, acting as designated paths, guide users through different functionalities, while views, as functions attached to routes, handle the logic associated with each route.
We provided a simple overview of routes, emphasizing their significance in directing traffic and managing requests. A step-by-step guide was presented on how to define a basic route in Flask, using the @app.route() decorator. The components of a route, such as the @ symbol and the path, were explained to offer a clear understanding.
Next, we explored the concept of views in Flask. Views are functions bound to routes, and we demonstrated how to create a basic view function for a route. The importance of view functions in completing the definition of a route was underscored, and a practical example was provided.
Additionally, we introduced the use of HTTP methods in Flask routes, showcasing how to handle different methods, such as GET and POST, and how to use multiple methods for the same route.
A fascinating aspect of Flask routes was uncovered – the ability to pass parameters from routes to views. We illustrated how to include parameters in routes and access them in view functions. While string parameters are flexible by default, we highlighted the importance of specifying data types for other types, such as integers, floats, 0UUIDs, and paths.
As we journey deeper into Flask development, upcoming articles will explore rendering HTML with Jinja templates, enhancing your skills in web development. Stay tuned for more practical examples and valuable insights.
Subscribe to our newsletter for updates on the series, and feel free to reach out with any inquiries or discussions via twitter @Yaw__Amponsah and email yawamp27@gmail.com. Thank you for joining on this exciting exploration of Flask, and I look forward to sharing more knowledge in the next chapter of this series.
Happy coding!
For the codes used in this article, Kindly click here.